Note: Some links may earn us a commission at no cost to you. Learn more in our privacy policy.
You can’t fix what you can’t see.
PDR light is an essential part of paintless dent repair business, and most PDR techs have several types of lights in their toolset. In this article, we’ll dive into the specifics of what is pdr light, how to use it, with types and techniques as well as how many lights should you get.
Now, let’s take a closer look at what is PDR light used for, and how it’s used.
What is a PDR Light?
We use PDR light during paintless dent repair to better see a dent that needs fixing. The dent will be casting a shadow (fog technique), or bending the lines if using the line technique. We use these shadows and lines to repair the dent using our PDR tools.
The type of light PDR tech will use depends on the technique used, personal preference, and skill. You can check the best PDR lights and light boards on this post. While you can build your own pdr light, oftentimes, it’s a much better choice to buy one of the available products on the market, if not just the budget option for start.
For those considering a DIY approach, remember that the effectiveness of a PDR light isn’t just in its brightness but in the quality and direction of its beam. The right light can make all the difference in revealing those hard-to-spot dents.
How to use a PDR Light?
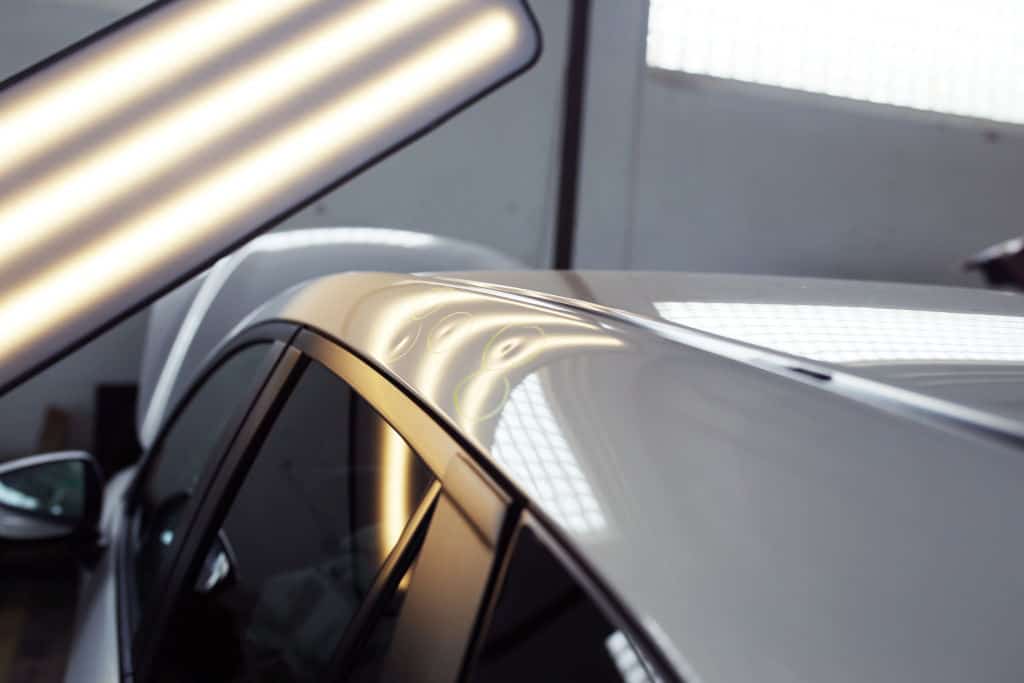
PDR light is used in such a way that you’ll be looking at a light reflection on the car itself, and fixing the dent until the dent shadows, or bent lines, completely go away. Dents are pushed from the inside of the car with special tools or pulled from the outside with a pull gun.
It’s essential to angle the PDR light correctly, ensuring the dents are clearly visible. Positioning the light at varying distances and angles can help in spotting even the minutest of dents.
Additional tools are used to massage the dents, such as knockdowns, cranes, ratchet handles, bars, and others.
A pro-tip: Using a PDR light against a glossy black or reflective background can significantly amplify the dent’s visibility, making it easier for technicians and DIY enthusiasts alike.
What are the main types of PDR lights?
Most PDR lights today are LED lights and can be very flexible so you can adjust them in any direction you want. We can distinguish PDR lights by the type of light and by size.
PDR lights by the type of light are:
- Fog lights, and
- Line lights (or line boards)
The usual fog PDR lights mostly consist of three and more strips, which you can adjust and set up depending on your preference and the depth of the dent. With these lights, we use shadows cast by the dent itself to repair the dent.
Line lights/boards cast lines on the car which get distorted when they pass across the dent, which we can use to fix the dents. These lights can be more difficult to learn how to use, however, they are sometimes a bit more precise in repairing the dents. The more lines on the board, or on the reflection on the car, the higher the detail.
PDR types by sizes typically are:
- Smaller, mini PDR lights, and
- Larger, tail/shop lights, and fatheads
Smaller (mini) lights are best used when starting up to work on a dent, cross-checking, and side panel work. They have suction cups, which hold them attached to a car at any point. They’re almost always portable, very easy to use, but can be inadequate at times.
When the mini light is no longer sufficient, we switch to larger PDR lights such as tail lights, shop lights, and fathead lights. For fixing hail damage with PDR, fathead PDR lights are probably the best choice. Not having to move your light in the middle of hail repair is a great advantage and time saver, and this is where these fatheads are excellent. To learn more about PDR lights, you can check this PDR light guide.
Keep an eye out for PDR lights with adjustable color temperatures. Different colors can reveal different aspects of a dent – warmer colors might highlight depth, while cooler tones can show edges more clearly.
Techniques when using a PDR Light
There are two main techniques when using PDR lights, the fog technique, and the lines technique.
The Fog Technique
This simple technique relies on shining a light on a dent, and in turn, the dent casts a shadow and changes the contrast so you can see the dent better. Fog is a contrast, so when you’re using fog you can see the differences, in contrast, the dark, and the light. Based on that separation you can see the dent size and depth more clearly.
The downside with fog repair can be noticed if working outside, as the sunlight can interfere with the repair. This can be solved with a highly bright PDR light, or a bright reflector board with lines.
While fog lights are excellent, remember that dust and grime on the car’s surface can interfere with the light’s reflection. Always ensure the vehicle is clean to maximize your PDR light’s efficiency.
The Lines Technique
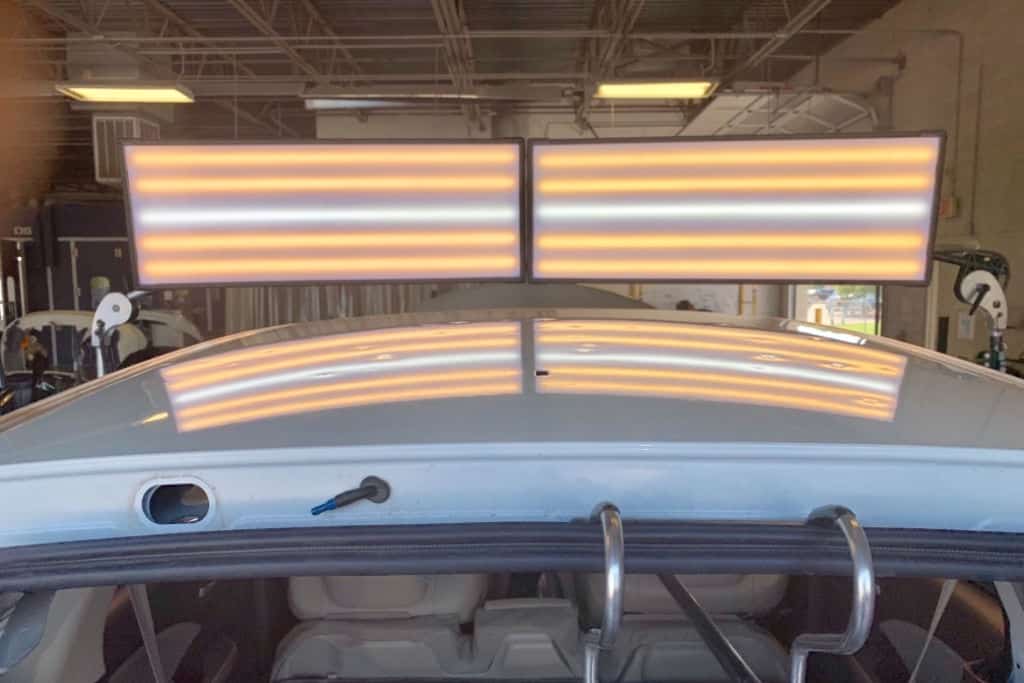
The lines technique relies on shining a PDR light that has lines in it so that it casts a bunch of parallel lines on the car, where you use the lines to find the size of the dent based on the line distortion.
The finer the lines are on the light, the more detail the PDR tech is going to see. In other words, the more lines there are, the higher the quality and detail.
How to read the lines? One way to learn the lines technique is to take advice from Myke Toledo and start learning with half-inch lines, then quarter-inch lines, and incrementally move to 16th of inch lines.
One way to make it easier to work with is to decrease the detail of the dent by moving the light closer to the car, so you’ll have fewer lines. A good starting point for that could be quarter-inch lines. As you move on with the repair, you can move the light further away to increase the detail, so you can see more lines and how deep the dent is.
When starting with line lights, focus on using them in controlled environments, like a dim garage. Outdoor conditions, especially direct sunlight, can make it challenging to discern the reflected lines accurately.
For those venturing into DIY PDR, line lights offer an intuitive way to spot distortions. But, it’s crucial to practice and understand the nuances of how these lines interact with dents, ensuring a smoother repair process.
Here’s a video on how to start fixing the dent using the line technique from Myke Toledo:
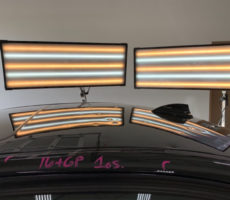
You can learn to find a low spot or high spot with a reflector line board. If it’s a low spot the lines will be stretched, and if it’s a high spot the lines will shrink.
Here are some basics on paintless dent repair with a light board:
Advancements in PDR lighting technology have brought forth portable options that are not just effective for professionals but also suitable for DIY enthusiasts. With the right tools, even a beginner can achieve results comparable to pros.
Should you get big or small PDR light?
Which PDR light do you need? You might be asking yourself whether the mini light is worth getting, or should you get the big, shop light?
Generally, you will probably need at least one big light, not only if you’re doing hail damage, but also because you’ll be able to work continuously without having to keep moving the light as you go.
Big light is great because you can see a lot of damage, especially if you’re going to be fixing hail damage. So the general advice is to get the big light, as you’ll be much happier with it than with the mini light.
While larger PDR lights offer more coverage, don’t underestimate the value of mobility. Mini lights are invaluable for tight spaces, like between the wheel and the body, where larger lights might not fit.
For DIY enthusiasts, I feel I should strongy advise that investing in a good quality PDR light is essential. It’s not just about identifying the dents but understanding their depth and size, which a premium PDR light can clearly indicate.
How many PDR lights should you get?
Typically, you’re probably going to need at least two lights, not only because you’ll be able to experiment and see which one suits you best, but also you can use stacked lights, and you can cover a larger surface, which gives you more freedom.
PDR toolset can cost a lot, but so does the cost of paintless dent removal. The better the work you can do, the more customers you can attract, and the more you can charge.
It takes only two minutes to set up a big light, while the small one is immediately ready. Portability can be an issue depending on the light, but you can buy a battery for most of them, and move them around as you please. Stuckey XL big light has a small battery behind it, which makes it completely portable, with no cables to get in the way. Most mini lights are portable without any cables and have suction cups so you can place them anywhere on the car.
For individuals keen on diving into DIY PDR, remember that while the technique is crucial, the tools you employ, especially the PDR light, play an indispensable role. Therefore, invest wisely, practice diligently, and always prioritize safety.
As with any tool, periodic maintenance of your PDR light, such as cleaning the LED strips and checking for any dimming, ensures you get consistent, high-quality results every time.


")


